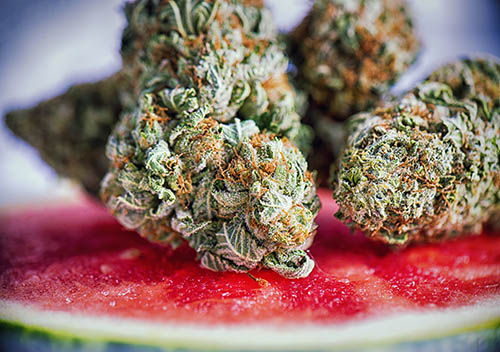
Marijuana is beautiful. There’s no denying that. But capturing its beauty in a photograph can be tricky. If you’re not sure where to start, don’t worry! We’ve got you covered with some cannabis photography tips to help you create stunning images of marijuana that will impress your friends and followers.
A Growing Field
Whether you’re a small business owner seeking to improve the pictures of your products for social media, a photographer who works for a growing operation, or a customer taking photos with your phone of what you get at a dispensary, we’re all trying to enhance marijuana’s image. It may take a long time and some practice to learn how to photograph cannabis plants and products. Here are some tips and tricks you can use to improve your weed photography.
Control the Light
Great picture-taking does not necessarily require professional studio lighting. Desk lamps may be a wonderful alternative. Place your lights near your cannabis subject, and shift them around until you find a shot that works.
A popular and tried-and-true lighting setup for studio photography of all kinds is the 3-point setup. This involves:
- Key Light – Main light used on your subject. Usually placed in front a bit overhead, shining down. Think of this as your “sun.” It replicates outdoor light and shadows that the human eye is accustomed to seeing.
- Fill Light – A diffused light that fills in the shadows created by the key light, placed lower and to the side.
- Back Light – Another diffused light, shining on the subject from the back to separate the subject from the background.
You may turn the lampshade around so it becomes a cone if you don’t have access to professional lighting. This allows you to control the light. Cover the end with a little piece of thin white cloth or paper. This will spread light and help to minimize glare on glossy surfaces, similar to methods employed by skilled photographers.
With Weed, the Flash is Not Your Friend
Have you ever attempted a self-portrait with your camera’s flash on? It seldom turns out well. The bright light is reflected by the mirror and causes a glare in the camera’s lens. Marijuana photography is similar to this.
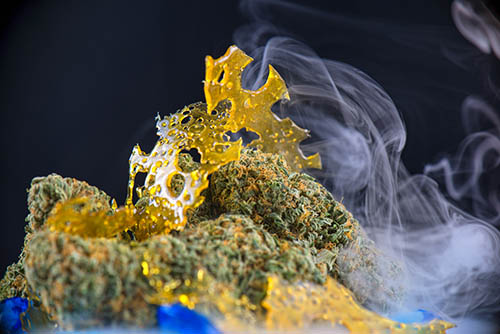
The tiny crystals (trichomes) that cover your marijuana are highly reflective, as are most oil-based concentrates. If your flower shots are faded, or if your concentrate pictures have big white spots or streaks; consider using the 3-point method instead of the flash.
Steady as She Goes
Perhaps your cannabis photographs are coming out a little blurry? Particularly when taking close-up and detailed photos, any movement will result in a fuzzy picture. So if you are holding your bud while trying to photograph it, that’s a no-no. Put your cannabis subject on a stable surface and try using a tripod, or something similar to steady your camera.
You can also try lying down on the ground so that your body is level with the subject. This will give you a stable surface to work with and help keep your hand from shaking as you take the photo.
You can also use a stool, or anything of similar height to place it next to your work surface. To keep the shot steady, lay your elbows on the stool. Alternatively, lean against a nearby wall or solid structure for support.
Ultimately, using a tripod with your camera is the best way to reduce shake & blur. There are many low-cost phone tripods and holders on the market. If you are serious about marijuana photography, then it may be worth the investment to get a holder that will keep your phone still.
Crop it Like You Mean It
In addition to a blurry image, another problem you might encounter is that not as much of your cannabis subject is in the photo as you would like. This can happen when you’re taking close-up pictures and are trying to setup your final cropping “in-camera.” The best way to avoid this is by zooming out from your subject a little bit and then relying on photo editing software to crop your picture later. This approach will give you more options to find and frame the best shot.
With digital photography, you can take as many pictures as you want without wasting film. So go ahead and experiment with different angles and perspectives. Take a lot of pictures and then choose the best ones.

Use Photo Editing Software
There are certainly photography purists who look down upon photo editing, but their numbers are few. Today’s reality is that most great photographs are edited to some degree in post-processing. This is especially true for cannabis photography.
The photo editing software of choice for many professional photographers is Adobe Lightroom. It’s a comprehensive program that offers non-destructive editing, meaning your original photograph remains untouched and unaltered. You can experiment with different edits and then simply discard the changes.
The Last Toke
You’ll come up with your own technique for taking dank pictures after some practice. To alter the lighting on your vape pen, move your lights around between takes. After each photo, rotate your bong to a new position. Experiment with settings and adjustments in your editing application. Don’t be scared to play around. It’s the greatest method to learn what works for you as a cannabis photographer! The team at Frost Exotic Cannabis Denver Dispensary knows a thing or two about photographing our favorite plant, so next time you come in, ask us all about it,